使用网页编辑器
Categories
 Robin's 绝对领域
使用网页编辑器
https://github.com/0xJacky/nginx-ui/releases/tag/v2.0.0-beta.35
这个版本是最稳定的
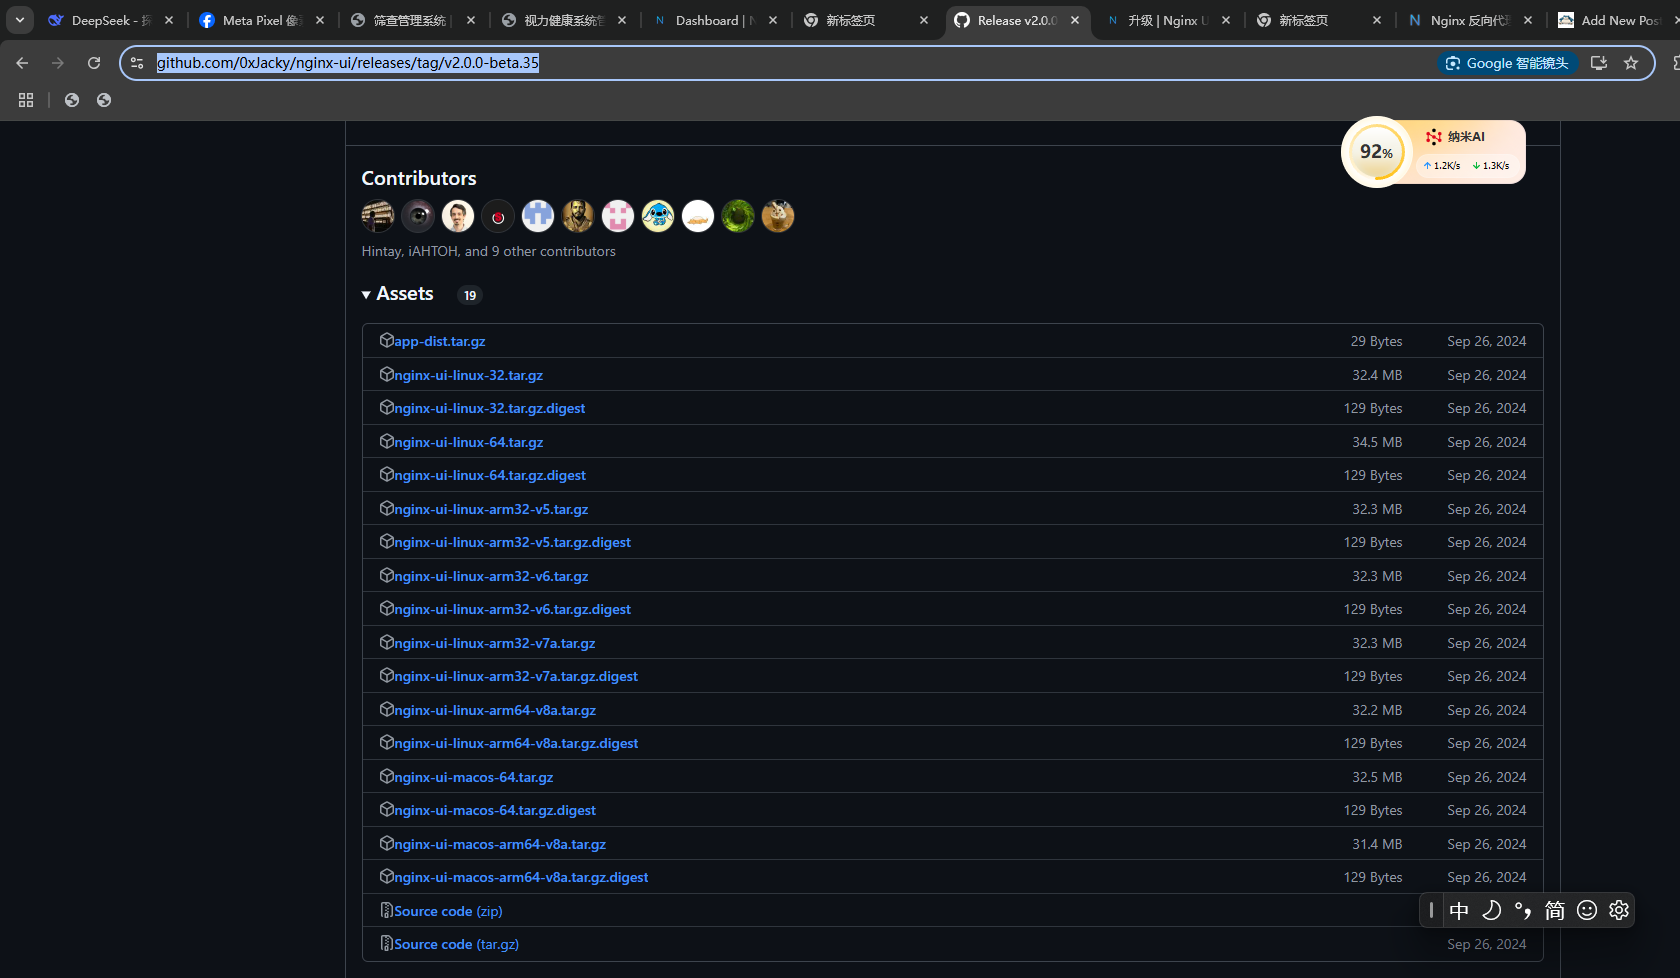
下载二进制后解压 就可以直接运行 默认运行在9000端口上
在 Laravel 中,使用 php artisan queue 创建并执行异步任务的完整流程如下:
在 .env 文件中设置队列驱动(如 database、redis、sqs 等):env复制下载
QUEUE_CONNECTION=database
如果需要使用 database 驱动,需先创建 jobs 表:bash复制下载
php artisan queue:table
php artisan migrate
使用 Artisan 生成一个 Job 类:bash复制下载
php artisan make:job ProcessPodcast
在控制器或 CLI 命令中调用 Job:php复制下载
use App\Jobs\ProcessPodcast;

// 分发任务到队列
ProcessPodcast::dispatch($podcastData);

// 延迟执行(5秒后运行)
ProcessPodcast::dispatch($podcastData)->delay(now()->addSeconds(5));

// 指定队列(如 "high" 优先级队列)
ProcessPodcast::dispatch($podcastData)->onQueue('high');

// 传输参数例子
ImportSCEyeScreeningBatRoaster::dispatch($task->id,$EyeScreeningBatID,$path,Admin::user());
运行队列处理器:bash复制下载
php artisan queue:work
常用选项:
| 选项 | 说明 |
|---|---|
--queue=high,default | 优先处理 high 队列 |
--tries=3 | 失败任务重试次数 |
--timeout=60 | 任务超时时间(秒) |
--daemon | 守护进程模式(生产环境推荐) |
dispatch() 将任务序列化后存入 jobs 表(database 驱动)。queue:work 从队列中取出任务并反序列化。handle() 方法failed_jobs 表(需配置)。docker-compose
version: '3'
services:
  jenkins:
    image: jenkins/jenkins
    container_name: jenkins
    restart: unless-stopped  #指定容器退出后的重启策略为始终重启,但是不考虑在Docker守护进程启动时就已经停止了的容器
    volumes:
      - "/usr/bin/docker:/usr/bin/docker"
      - "/var/run/docker.sock:/var/run/docker.sock"
      - "/usr/lib64/libltdl.so.7:/usr/lib/x86_64-linux-gnu/libltdl.so.7"
      - "./jenkins/jenkins_home:/var/jenkins_home"
      - "./jenkins/jenkins_config:/var/jenkins_config"
    environment:
      http_proxy: 'http://192.168.0.12:33333'
      https_proxy: 'http://192.168.0.12:33333'
      TZ: Asia/Shanghai
      LANG: en_US.UTF-8
      JAVA_OPTS: '-Xmx2048M -Xms2048M -XX:+UseG1GC -XX:MaxGCPauseMillis=200 -XX:MaxNewSize=128m -Djava.util.logging.config.file=/var/jenkins_home/log.properties -Duser.timezone=Asia/Shanghai'
    user: root
    ports:
      - "10000:8080"
由于默认插件地址是国外的 没有插件jenkins可就没啥用了
所以安装完成后在插件市场 plugin manager设置 插件更新地址
https://eastamerica.cloudflare.jenkins.io/current/update-center.json
screen -S import_mysql4;开启多一个screen 来执行异步进程
mysql -uroot -p连接mysql
source xxx.sql;执行导入 本地文件mysql文件
ctrl+A D退出 当前screen
之后可以退出ssh 不影响该import 进程
screen -ls列出有什么screen进程
screen -r XXX;恢复某个screen进程
简介:一款能连接和发送打印到 Bambu Lab 3D 打印机的精简工具
bambu-connect://import-file?path=%2Ftmp%2Fcube.gcode.3mf&name=Cube&version=1.0.0
浏览器打开这个链接会启用bambooconnect 执行模型导入
具体教程:
bambustudio://open?file=https%3A%2F%2Fmakerworld.bblmw.cn%2Fmakerworld%2Fmodel%2FCN5139cd3ed4128%2F27338432%2Finstance%2Fcc8b73a0-2635-4556-ae20-9b52f9f350d7.3mf%3Fat%3D1746121131%26exp%3D1746121431%26key%3Db7425e4b9ef6f417d7334deb194efee6%26uid%3D683076520%26name%3Dmini%E5%
打开这个链接会启用 bambustudio 导入项目
这个网站有所有 composer包的信息